
![]()
Welcome friends, this is just an introduction to the tensorflow and how graphs are created and visualised in the tensorboard. We will also touch session and difference between building the graph and running the graph. In other words, this is a series on tensorflow and we as a team will try to build your basics from scratch. We will cover topics related to tensorflow basics with live codes and graphs in all throughout series. We assure you that after going through tensorflow tutorials, you will get better knowledge of deep learning library.
Let us start from scratch and we will build code to understand basics. Tensorflow is deep learning library which created the graph with nodes and tensor are fed to these nodes. Donot worry I will write post on understanding tensors.
We will build the code where first 4 lines are used to create the graph and next four lines to run the graph created. I will also help you visualize the graph using the tensorboard. Please see the below screenshot.
import tensorflow as tf
node1 = tf.constant(3.0)
node2 = tf.constant(5.0)
node3 = node1*node2
sess= tf.Session()
File_writer = tf.summary.FileWriter("path ",sess.graph)
print(sess.run(node3))
sess.close()
Let us divide the code into 2 half.
Line1-4 is used to create the graph. If you run the code till line 4 i.e print (node3), you will get tensor at the output.
Line5-Line8: Session is used to run the graph.
Explain code Line wise
Line1: Import tensforflow as tf
Line 2: create first constant named as node1 which is a constant
Line3: create another constant named as node2 which is another constant using tf.constant
Line 4: Multiplication of both the constant
Line 5: sess object is created for running the graph build till step 4
Line 6: Visualize the graph in the tensorboard from the file created at this step. Please provide the path where file for creating the graph will be stored. I will suggest you to create a new directory in the current directory and save the graph file there.
Line 7: print sess.run(line4)
Line 8: Close the session.
You can also visualize the result in the tensorboard by typing the following command.
tensorboard --logdir=folder where you place the graph file
You will get some link after executing the above code in the command prompt like http://ai-pc:6006
Let us see the graph of this code
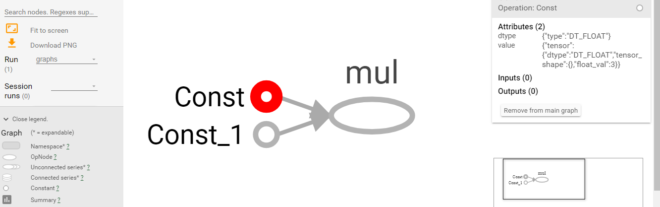
Please have a look at the part 2 of the tensorflow series from below